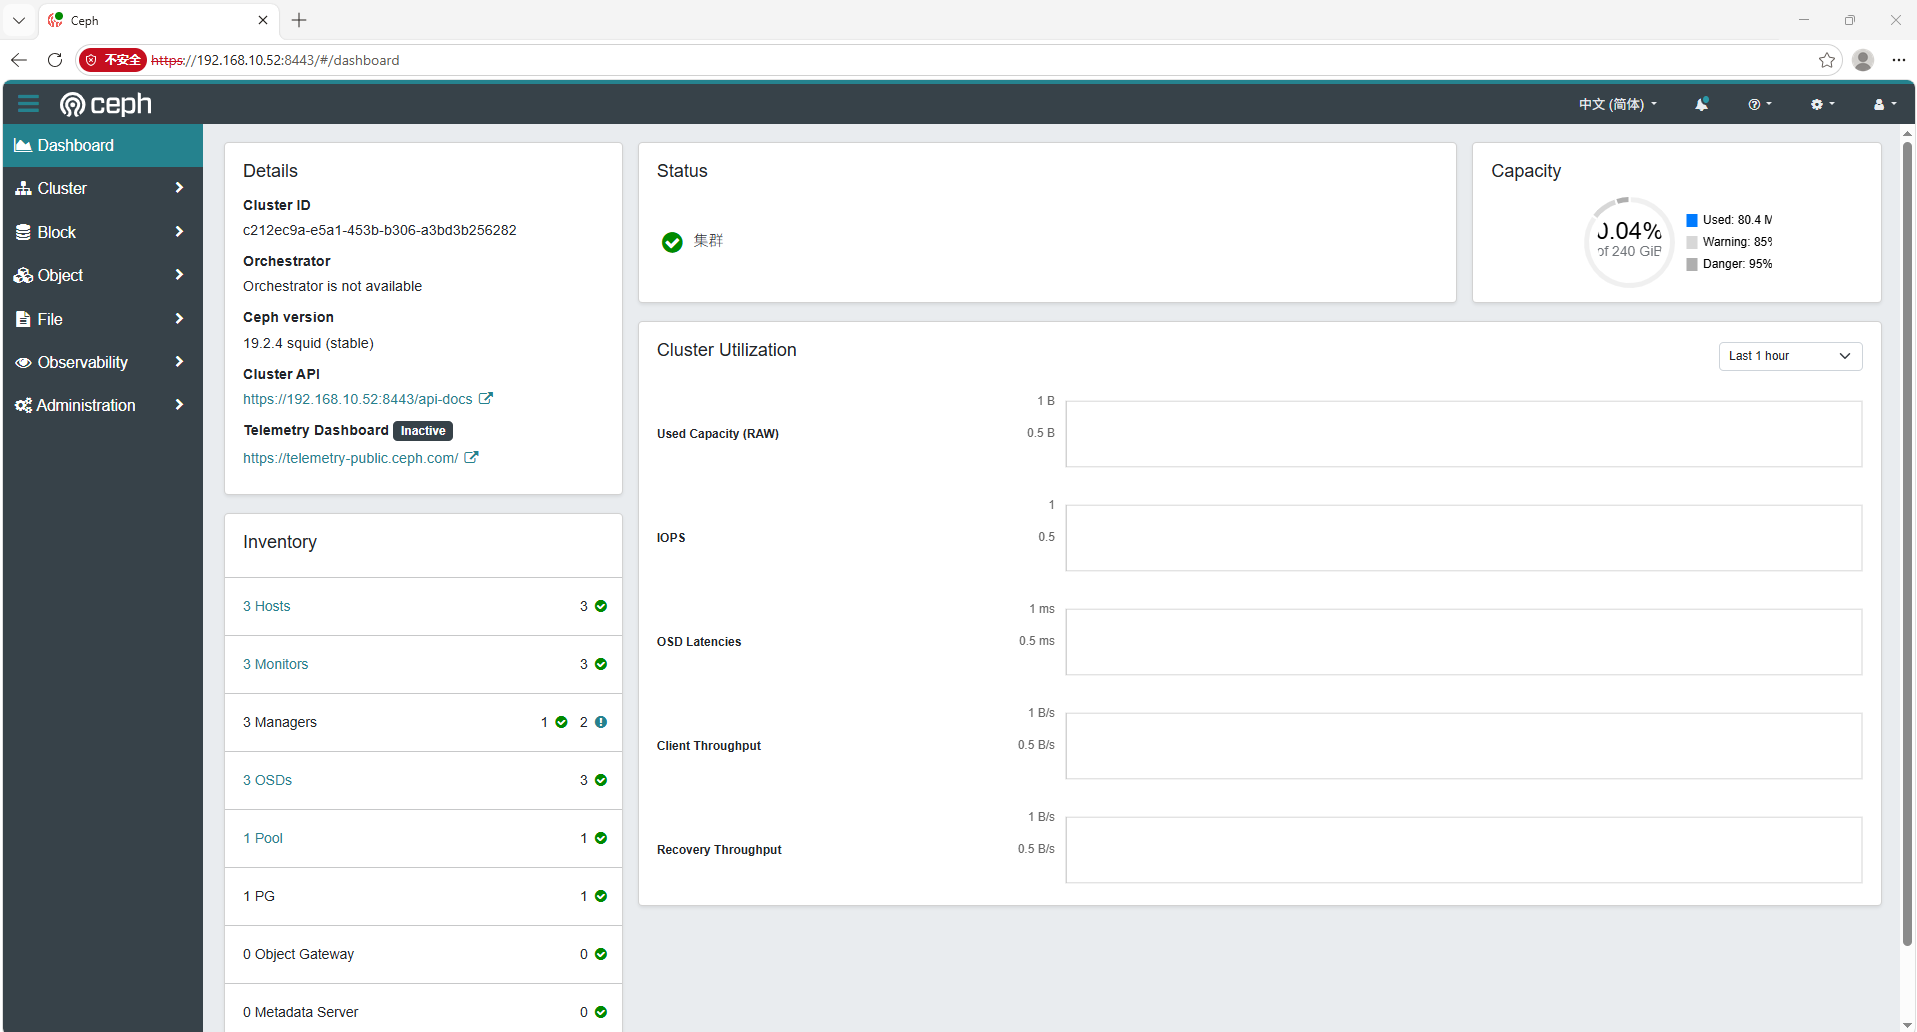
一、 集群环境规划
操作系统:Ubuntu 22.04
集群网络:192.168.10.0/24
部署节点:
x1 192.168.10.52 /dev/sdb (80G) 主控节点、MON、MGR、OSD
x2 192.168.10.53 /dev/sdb (80G) 计算节点、MON、MGR、OSD
x3 192.168.10.54 /dev/sdb (80G) 计算节点、MON、MGR、OSD
二、 基础环境准备(所有节点跑)
在开始前,确保三台机器能够通过Host相互解析,且root之间已做好SSH免密登录。
安装官方原生二进制组件
apt update && apt install -y ceph ceph-common
三、 集群核心骨架搭建(在主控机 x1 上跑)
- 生成集群唯一 ID (FSID)
uuidgen
记下这串 UUID,例如:c212ec9a-e5a1-453b-b306-a3bd3b256282 - 手写总指挥蓝图 /etc/ceph/ceph.conf
mkdir -p /my-cluster && cd /my-cluster
nano ceph.conf
输入以下内容(替换你的真实 UUID):
[global]
fsid = c212ec9a-e5a1-453b-b306-a3bd3b256282
mon_initial_members = x1, x2, x3
mon_host = 192.168.10.52, 192.168.10.53, 192.168.10.54
public network = 192.168.10.0/24
auth_cluster_required = cephx
auth_service_required = cephx
auth_client_required = cephx - 生成集群初始安全钥匙环
生成 MON 初始钥匙
ceph-authtool --create-keyring ceph.mon.keyring --gen-key -n mon. --cap mon 'allow *'
生成 Admin 钥匙
ceph-authtool --create-keyring ceph.client.admin.keyring --gen-key -n client.admin --cap mon 'allow ' --cap osd 'allow ' --cap mds 'allow ' --cap mgr 'allow '
合并钥匙环
ceph-authtool ceph.mon.keyring --import-keyring ceph.client.admin.keyring
4.创建监控拓扑图 (MonMap)
monmaptool --create --add x1 192.168.10.52 --add x2 192.168.10.53 --add x3 192.168.10.54 --clobber ceph.monmap - 将配置与钥匙分发到所有节点
分发给 x2
ssh root@x2 "mkdir -p /etc/ceph /my-cluster"
scp ceph.conf ceph.client.admin.keyring root@x2:/etc/ceph/
scp ceph.mon.keyring ceph.monmap root@x2:/my-cluster/
分发给 x3
ssh root@x3 "mkdir -p /etc/ceph /my-cluster"
scp ceph.conf ceph.client.admin.keyring root@x3:/etc/ceph/
scp ceph.mon.keyring ceph.monmap root@x3:/my-cluster/
x1 自己同步到通用系统目录
mkdir -p /etc/ceph
cp ceph.conf ceph.client.admin.keyring /etc/ceph/
四、 激活分布式 Monitor 集群,分别初始化各节点的监控目录,并交给 systemd 原生启动。 - 节点 x1
mkdir -p /var/lib/ceph/mon/ceph-x1
ceph-mon --cluster ceph --mkfs -i x1 --monmap /my-cluster/ceph.monmap --keyring /my-cluster/ceph.mon.keyring
chown -R ceph:ceph /var/lib/ceph/mon/ceph-x1
systemctl enable --now ceph-mon@x1 - 节点 x2
ssh root@x2 "mkdir -p /var/lib/ceph/mon/ceph-x2 && ceph-mon --cluster ceph --mkfs -i x2 --monmap /my-cluster/ceph.monmap --keyring /my-cluster/ceph.mon.keyring && chown -R ceph:ceph /var/lib/ceph/mon/ceph-x2 && systemctl enable --now ceph-mon@x2"
3.节点 x3
ssh root@x3 "mkdir -p /var/lib/ceph/mon/ceph-x3 && ceph-mon --cluster ceph --mkfs -i x3 --monmap /my-cluster/ceph.monmap --keyring /my-cluster/ceph.mon.keyring && chown -R ceph:ceph /var/lib/ceph/mon/ceph-x3 && systemctl enable --now ceph-mon@x3" - 优化修复新版本监控警告(在 x1 上跑)
ceph config set mon auth_allow_insecure_global_id_reclaim false
ceph mon enable-msgr2
五、 激活分布式 Manager 管理集群 - 节点 x1
mkdir -p /var/lib/ceph/mgr/ceph-x1
ceph auth get-or-create mgr.x1 mon 'allow profile mgr' osd 'allow ' mds 'allow ' > /var/lib/ceph/mgr/ceph-x1/keyring
chown -R ceph:ceph /var/lib/ceph/mgr/ceph-x1 && systemctl enable --now ceph-mgr@x1 - 节点 x2
ssh root@x2 "mkdir -p /var/lib/ceph/mgr/ceph-x2"
ceph auth get-or-create mgr.x2 mon 'allow profile mgr' osd 'allow ' mds 'allow ' | ssh root@x2 "tee /var/lib/ceph/mgr/ceph-x2/keyring"
ssh root@x2 "chown -R ceph:ceph /var/lib/ceph/mgr/ceph-x2 && systemctl enable --now ceph-mgr@x2" - 节点 x3
ssh root@x3 "mkdir -p /var/lib/ceph/mgr/ceph-x3"
ceph auth get-or-create mgr.x3 mon 'allow profile mgr' osd 'allow ' mds 'allow ' | ssh root@x3 "tee /var/lib/ceph/mgr/ceph-x3/keyring"
ssh root@x3 "chown -R ceph:ceph /var/lib/ceph/mgr/ceph-x3 && systemctl enable --now ceph-mgr@x3"
六、 擦除并收编OSD物理数据盘 - 重置并同步 OSD 引导密钥(在 x1 上跑)
清理可能存在的历史秘钥并重新申请
ceph auth del client.bootstrap-osd 2>/dev/null
ceph auth get-or-create client.bootstrap-osd mon 'profile bootstrap-osd' -o /var/lib/ceph/bootstrap-osd/ceph.keyring
chown ceph:ceph /var/lib/ceph/bootstrap-osd/ceph.keyring
同步引导秘钥给 x2 和 x3
ssh root@x2 "mkdir -p /var/lib/ceph/bootstrap-osd" && scp /var/lib/ceph/bootstrap-osd/ceph.keyring root@x2:/var/lib/ceph/bootstrap-osd/
ssh root@x3 "mkdir -p /var/lib/ceph/bootstrap-osd" && scp /var/lib/ceph/bootstrap-osd/ceph.keyring root@x3:/var/lib/ceph/bootstrap-osd/ - 擦盘并建立OSD
x1 节点
ceph-volume lvm create --data /dev/sdb
x2 节点
ssh root@x2 "ceph-volume lvm create --data /dev/sdb"
x3 节点
ssh root@x3 "ceph-volume lvm create --data /dev/sdb"
七、 开启原生 Web 图形管理面板 - 全网安装 Web 组件(x1, x2, x3 都要跑)
apt install -y ceph-mgr-dashboard - 激活并建立管理员账号(在 x1 上跑)
开启服务与签名
ceph mgr module enable dashboard
ceph dashboard create-self-signed-cert
建立临时密码文件(应对 v19 新版命令行安全限制)
echo "你的密码" > /tmp/dash_password
ceph dashboard ac-user-create admin administrator -i /tmp/dash_password
rm -f /tmp/dash_password
禁用不必要的遥测外发提示
ceph telemetry disable - 获取访问入口
ceph mgr services
会返回 https://IP:8443 地址,即可用 admin 及对应密码在浏览器完美登录。